New Homeowner Moisture Checklist: First 30 Days (San Diego Edition)
San Diego’s postcard-perfect weather hides a real challenge for homeowners: moisture. Whether you’re unpacking boxes in a coastal cottage, a downtown condo, or a Mission Valley rental, local conditions like marine layer fog, June Gloom, or even dry inland heat can put your home at risk for hidden leaks, condensation, and mold. The first 30 days in your new place are crucial—catching moisture issues now means fewer headaches and repairs later. Here’s a practical, safety-focused checklist to help you control moisture and protect your investment from day one.
1. Find Hidden Moisture Hotspots: Your First Walkthrough
Getting to know your home’s moisture risk zones is step one. In San Diego, moisture doesn’t just come from the sky—it sneaks in through pipes, appliances, and construction quirks, especially in older homes or multi-unit buildings. Coastal areas like Pacific Beach or La Jolla often see morning condensation on windows from the marine layer, while inland places like Poway or El Cajon face dry air but can hide slow leaks in attics or crawl spaces.
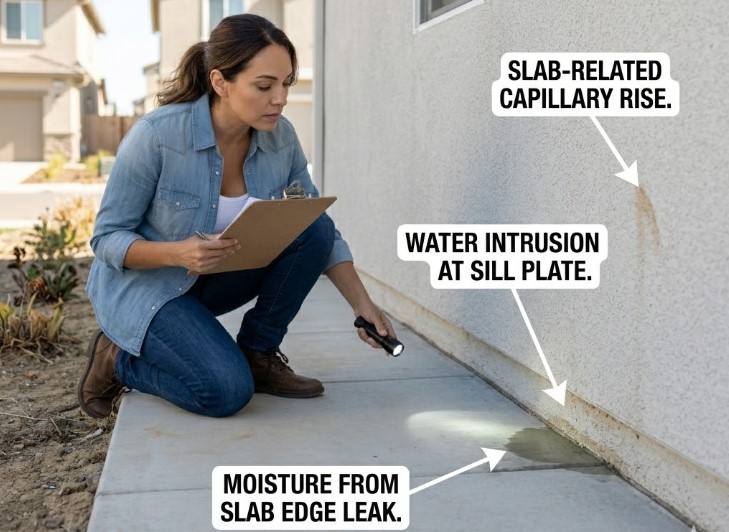
During your first walkthrough, focus on places where water likes to linger. Use a flashlight and, if you can, a moisture meter (about $25–$50 at a hardware store) to check under every sink, behind the washing machine, and around windows and doors. Don’t overlook closets on exterior walls or the inside of your HVAC closet—these often hide problems, especially in condos and apartments where shared walls can mask slow leaks. If you’re renting, snap photos and notify your landlord of anything suspicious.
Look for musty odors, bubbling paint, warped flooring, water stains, or rust on vents. For example, an under-sink leak in an older Normal Heights bungalow might leave the cabinet bottom soft or discolored. In a coastal condo, condensation on windows every morning can signal high indoor humidity.
Do-this-now: Grab a flashlight and check under each sink and along window sills for dampness, stains, or moldy smells. If you have a moisture meter, use it on suspect spots—especially if you see peeling paint or warped wood.
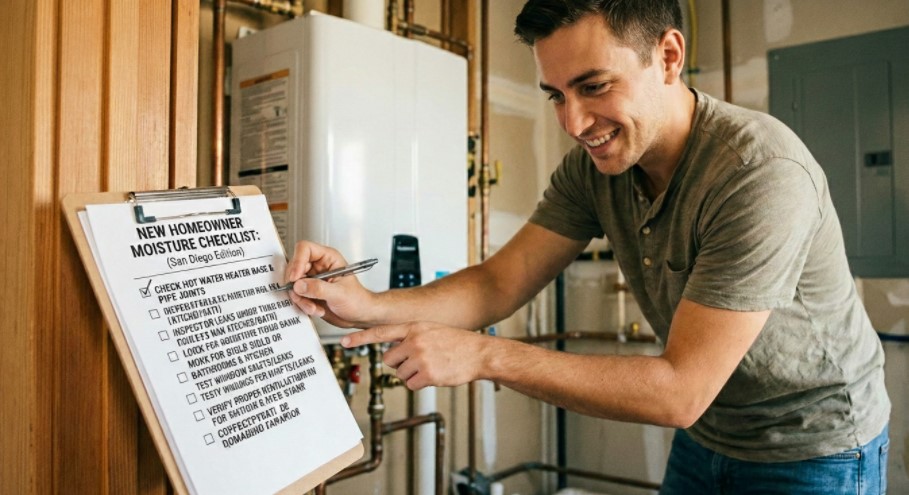
Hidden Moisture Inspection Checklist:
1. Under kitchen and bathroom sinks
2. Around toilets and bathtubs
3. Behind and under laundry appliances
4. In closets on exterior walls
5. Attic and crawl space access points
6. Inside the HVAC closet or room
7. Around all windows and doors
2. Responding to Leaks and Water Events: The First 48 Hours
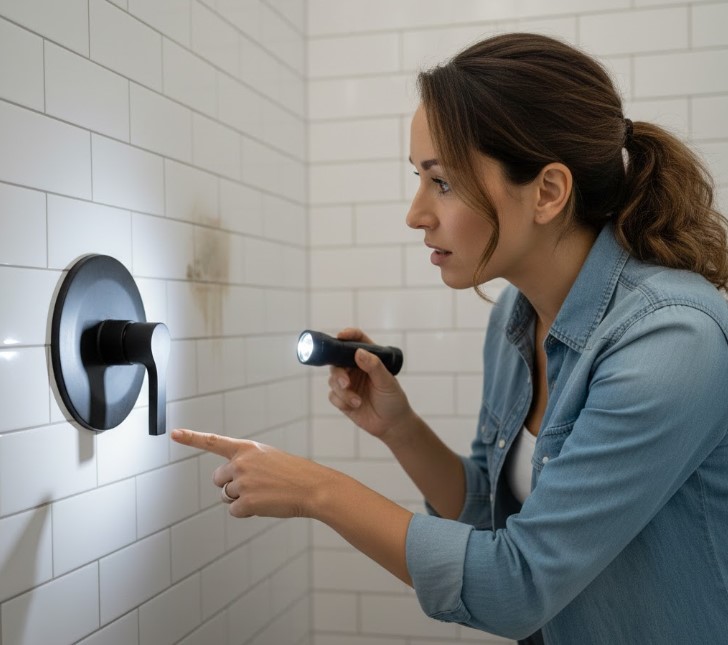
Leaks never arrive on schedule. Whether it’s a sudden toilet leak, a shower valve drip behind the wall, or a mysterious puddle under the kitchen sink, your response window is tight: Dry everything within 24–48 hours to cut the risk of mold. That means moving fast, especially after a water event—big or small.
If you find a leak, your first move is to stop the source. Turn off the water supply to the fixture, or the main if needed. Mop up standing water with towels or a wet vac and get air moving—open windows, run fans, and if you have one, set up a dehumidifier or the air conditioning. On day one, document all damage with photos (especially for insurance or landlord/HOA records), and note where water traveled—across floors, into walls, or under cabinetry. For renters or condo owners, this documentation is key to prompt repairs and proper insurance filing.
By the second day, inspect every area that got wet. Pull out drawers, lift up rugs, and use a moisture meter to check drywall, baseboards, or cabinets for lingering dampness. Even small leaks under sinks can soak into porous materials like wood, drywall, carpet, or insulation, so don’t assume it’s dry just because it looks better on the surface. If you’re dealing with a ceiling leak, signs of water behind walls, or any sewage or contaminated water, call a professional immediately.
Do-this-now: If you spot a leak under your bathroom sink, turn off the water, remove everything from the cabinet, dry up the water, and set a fan to blow directly into the space for at least 24 hours.
Leak Response Action Timeline:
– 0–24 hours:
– Turn off the water source
– Mop up standing water with towels or a wet vac
– Run fans and open windows for maximum airflow
– By Day 2:
– Check for hidden moisture behind/under affected spots
– Use a moisture meter for drywall and cabinets
– Photograph all damage for records and insurance
3. Mastering Ventilation: Fans, Attic Vents, and More
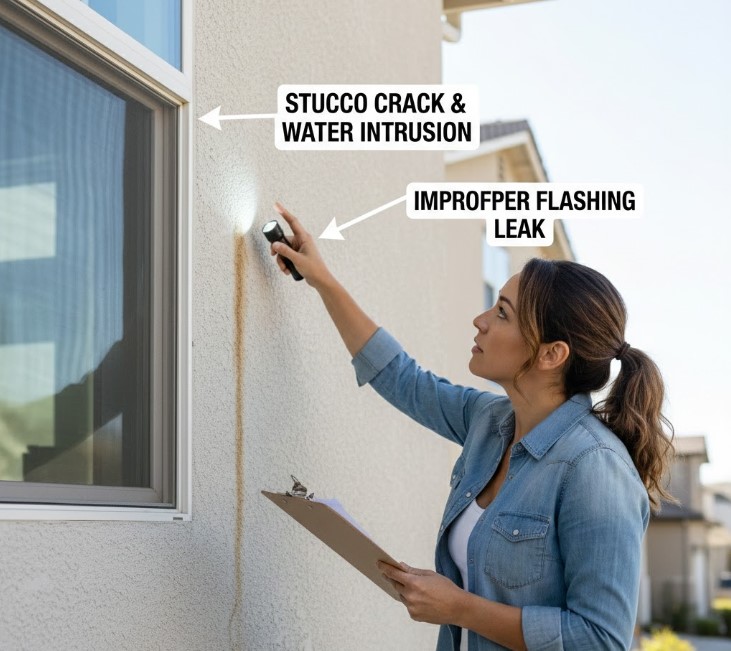
Good ventilation is your home’s first defense against hidden moisture buildup. In San Diego, this is especially important during the “June Gloom” or when that marine layer keeps mornings damp. Proper airflow dries out hidden moisture, reduces condensation, and helps prevent mold—especially in bathrooms, kitchens, attics, and laundry areas.
Check that all exhaust fans—bathroom, kitchen, laundry—are working and vented to the outside, not just into an attic or crawlspace. Hold a piece of toilet paper up to your bath fan; it should stick if the fan is pulling air. If your mirror stays foggy long after a shower, or your dryer is taking too long, ventilation may be inadequate. In condos and apartments, shared ventilation systems or HOA rules may limit upgrades, but regular cleaning and running fans longer after showers or cooking makes a difference. For houses, attic vents should be clear—damp or stuffy attics can signal blocked vents or insufficient airflow.
Programmable fan timers are a smart upgrade, ensuring fans run long enough to finish drying the space. If you’re not sure if a fan vents outside, turn it on and check for airflow at the exterior vent. Consider replacing old or noisy fans (expect $50–$150 for a basic model, plus installation).
Do-this-now: Run your bathroom fan for 30 minutes after every shower, and check outside to confirm that it’s actually venting outdoors, not just into the attic.
Ventilation Red Flags:
1. Bathroom mirrors stay foggy more than 10 minutes after a shower
2. Musty odors in kitchen or laundry room
3. Visible mold around vents or on window frames
4. Dryer takes more than one cycle to dry clothes
5. Attic feels damp, humid, or unusually warm
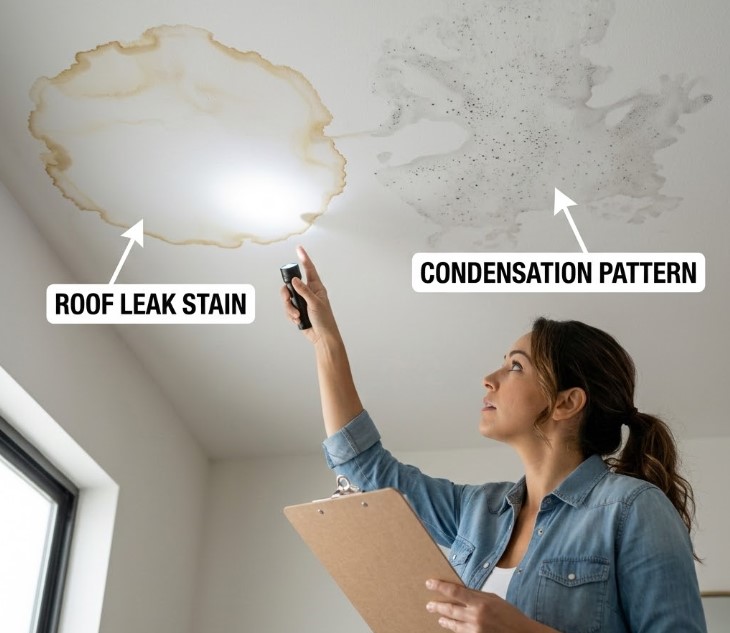
4. Preventing Mold by Controlling Moisture First
The best mold prevention strategy is moisture control. Mold is only a symptom—the real cause is excess water or high humidity. Focus first on finding and fixing leaks, drying out wet areas within 24–48 hours, and keeping indoor humidity in check. The EPA recommends keeping relative humidity (RH) below 60%, ideally between 30–50%. In coastal San Diego, window condensation is common during the marine layer or June Gloom, but even inland homes can hide moisture in attics or behind walls.
To monitor RH, set up a hygrometer (about $10–$30) in your main living area and another in the bathroom. Track daily readings for a week, and watch for spikes above 60%. Use a dehumidifier in problem rooms—especially closets, basements, or any area that feels damp. Air conditioners also help lower humidity, but a dedicated dehumidifier is more effective if you’re not cooling the house.
After any water event, verify dryness with a moisture meter before reinstalling baseboards or carpeting—porous materials like drywall, carpet, and insulation can trap hidden moisture. If you find visible mold larger than a dinner plate (about 10 square feet), or if leaks keep coming back, call a mold inspector for professional assessment and post-remediation verification. Renters should document all findings and notify landlords immediately; condo owners should check with their HOA for repair protocols.
Do-this-now: Place a hygrometer in your living room and bathroom. Log the RH every morning for the next seven days—aim to keep it between 30–50%. If you regularly see readings above 60%, consider a dehumidifier.
Mold Prevention Quick Wins:
1. Wipe away window condensation every morning for a week, especially during marine layer days
2. Fix slow drips or musty smells right away; don’t ignore them
3. Use dehumidifiers in closets or rooms that always feel damp
4. After any water event, use a moisture meter to confirm everything is dry—don’t just trust your eyes
5. For rentals or condos, document and report any issues to your landlord or HOA as soon as possible
Moisture Control in San Diego Homes: The Ultimate Guide
For a deep dive into managing moisture, explore this comprehensive guide packed with local tips and solutions.
Related reads:
– How to Spot and Fix Leaks in San Diego Homes
– Ventilation Upgrades for Older San Diego Houses
– Mold Prevention: Why Water Comes First
– Condensation Solutions for Coastal San Diego Homes
– Moisture Control Tips for San Diego Renters and Condo Owners
Frequently Asked Questions
How do I check for hidden moisture in my new home?
Start with a flashlight and check under sinks, behind appliances, around windows, and in the attic or crawl space. A moisture meter can help you spot damp drywall or cabinets that aren’t visibly wet. Look for musty odors, bubbling paint, warped wood, or rust on vents.
What should I do if I find a leak in the first 30 days?
Turn off the water supply, dry all affected areas within 24–48 hours using fans and dehumidifiers, and document the damage. Use a moisture meter to check for hidden wet spots. Contact your landlord or HOA for major leaks or if you’re a renter.
How can I improve ventilation in a San Diego condo or apartment?
Run exhaust fans longer after showers or cooking, clean fan grilles, and confirm vents go outside. If your building’s system is shared or limited by HOA rules, use portable fans and open windows when possible. Avoid venting bathroom or dryer fans into attics or crawl spaces.
What’s the ideal indoor humidity for San Diego homes?
Aim for 30–50% relative humidity (RH), but always keep it below 60% to limit mold risk. Use a hygrometer to monitor and adjust with a dehumidifier or AC if needed.
When should I call a professional for moisture or mold issues?
If you see visible mold larger than 10 square feet, have repeated leaks, find water damage in walls or ceilings, or deal with contaminated water (like sewage), call a pro. Also call for post-remediation verification after cleanup.
What tools do I need for a moisture inspection?
A good starting kit: flashlight, hygrometer, moisture meter, and a camera or smartphone for documentation. For under $100 you can get all the basics at a hardware store.
Does coastal San Diego have different moisture risks than inland areas?
Yes. Coastal homes deal with morning condensation and marine layer fog, which can increase window and wall moisture. Inland homes may have dry air but can hide slow leaks in attics or crawlspaces due to less ventilation and hotter temperatures.
How do I prevent condensation during the marine layer or June Gloom?
Keep windows closed during foggy mornings, run bathroom fans, wipe down any condensation, and monitor indoor humidity with a hygrometer. Use a dehumidifier if readings stay above 60%.
Next actions for today:
– Set aside 10 minutes for your first moisture inspection walkthrough—check under every sink and around all windows.
– Place a hygrometer in your living area and track RH for a week; adjust ventilation or add a dehumidifier if needed.
– Photograph and document any leaks or suspicious damp spots, and contact your landlord or HOA if you spot problems.
Taking these steps in your first month sets you up for a safer, drier, and healthier home—no matter what San Diego’s weather brings.