Shower Valve Leaks Behind the Wall: Symptoms and How to Confirm
San Diego homeowners know all too well that moisture is an ongoing battle—whether you’re up against foggy mornings in Ocean Beach or dry heat in Escondido. Hidden bathroom leaks, especially those sneaky shower valve leaks behind the wall, can strike in any type of home. These are the leaks you don’t see until there’s bubbling paint, a musty odor, or worse—mold. The sooner you catch these issues, the easier (and less expensive) they are to fix. Here’s how to spot, confirm, and manage a shower valve leak behind the wall, with practical steps for both owners and renters across San Diego County.
Why Shower Valve Leaks Are a Hidden Threat in San Diego Homes
Shower valve leaks behind the wall are surprisingly common—especially in San Diego’s older bungalows and high-density condos. The problem is, you often won’t notice a drip tucked inside your bathroom wall until damage is well underway. In coastal areas like Pacific Beach, marine layer moisture and slow drying can make even a small leak turn into a persistent problem. Inland homes may mask leaks for longer, as the dry air can slow visible symptoms.
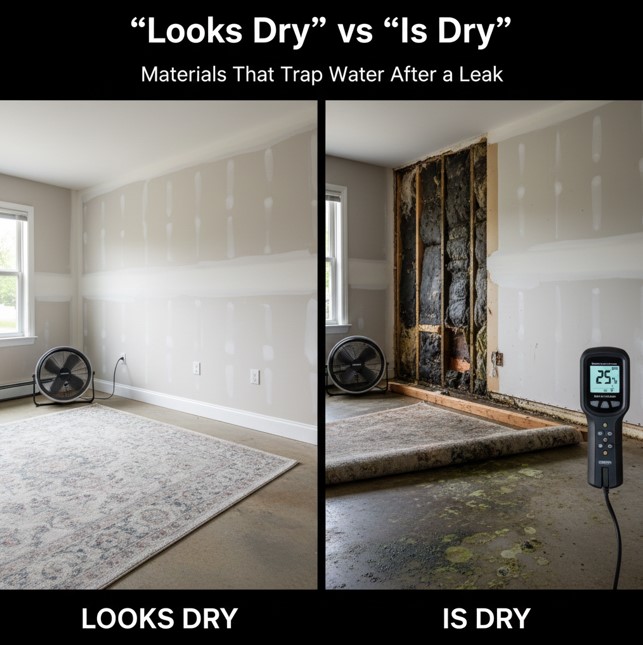
What makes these leaks risky is the way water can quietly soak insulation, drywall, and even framing. Unlike a burst pipe, a shower valve leak might only let out a trickle. But over weeks or months, that’s more than enough to cause water damage inside your bathroom wall, or even hidden mold. And since moisture control is the foundation of mold prevention, catching the leak early keeps your home healthier and your repair bills lower.
If you’re not sure where to start, do a quick check: run your shower for 10 minutes, then head to the room or closet behind the bathroom wall. Touch the surface and sniff for any musty odor. Dampness, peeling paint, or even a faint earthy smell can be your first clue.
Symptoms of a Shower Valve Leak Behind the Wall
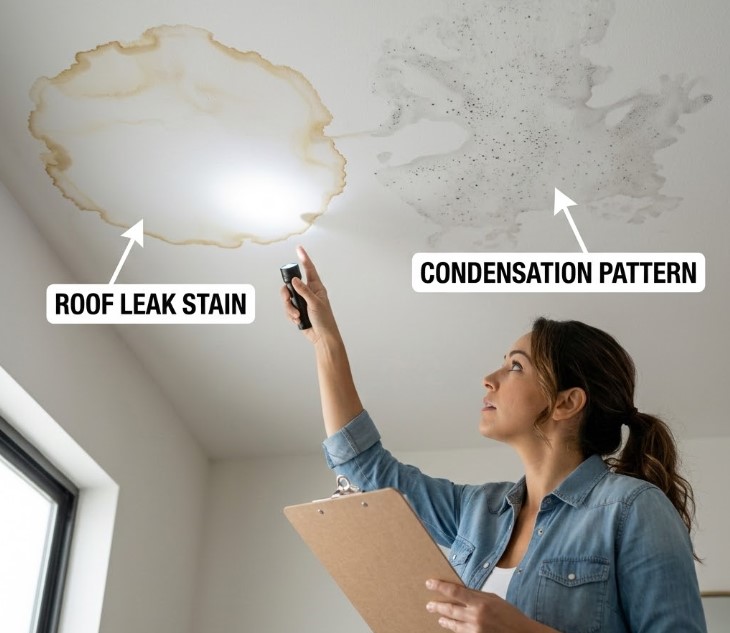
Hidden bathroom leaks don’t always announce themselves with a flood. More often, you’ll notice subtle symptoms—a soft patch on the drywall, unexplained water stains, or bubbling paint on the wall next to your shower. These warning signs are often mistaken for old paint or humidity from steamy showers, but they’re worth a closer look.
Sometimes, the first red flag is a musty odor after you shower, even if you run your bathroom fan. You might feel the wall and notice it’s cooler or slightly damp compared to other areas. Recurring mold spots, especially on painted or tiled walls, signal persistent moisture. In condos and apartments, water damage might show up in the ceiling or wall of a neighbor’s unit below, especially in stacked plumbing layouts.
It’s also worth keeping an eye on your water bill. A small but steady increase over a few months can mean a leak somewhere in your home. For a more technical check, a moisture meter can help you compare wall moisture levels. Or, place a paper towel on the wall after a hot shower—if it comes away damp, investigate further.
Do this now: After your next shower, press a dry paper towel along the wall behind the shower area. If you feel extra coolness, dampness, or see any water marks, don’t ignore it—these are early bathroom leak symptoms.
How to Confirm a Shower Valve Leak—DIY Methods and Tools
If you suspect a shower valve leak behind the wall, you don’t always have to rip open drywall to confirm it. Start by turning off all water in your home, then check the water meter. If it’s still moving, you have a leak somewhere—possibly behind your bathroom wall.
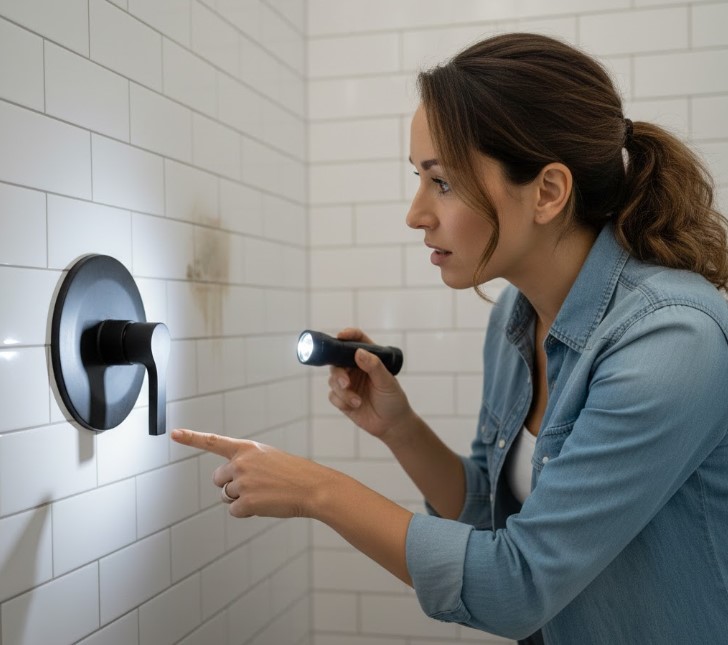
Next, remove the shower handle’s escutcheon (cover) plate. This is usually held by a couple of screws and gives you access to the valve area. Use a flashlight and an inspection mirror—these are inexpensive at hardware stores—to look for corrosion, water droplets, or obvious dampness. In homes with tile or stone, this is often your only quick peek behind the wall.
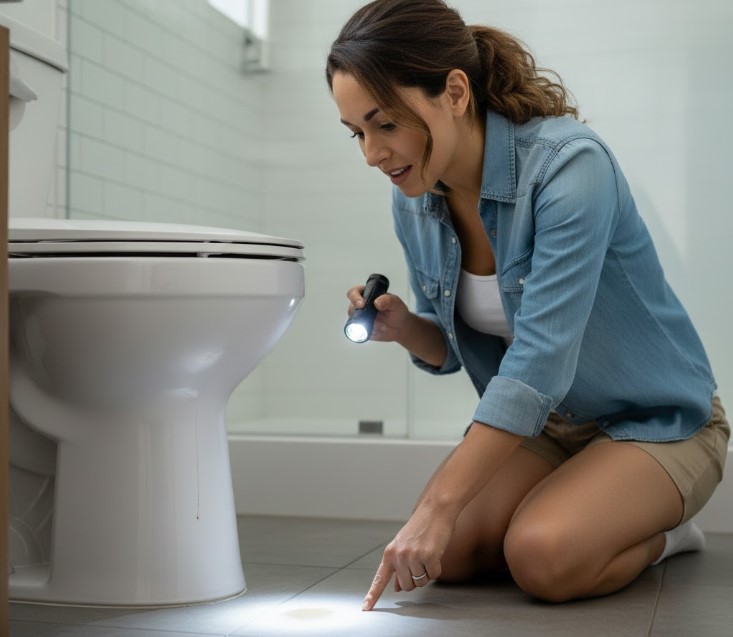
For apartments or condos, check the ceiling or wall below your shower for new stains or peeling paint; leaks often travel down and show up in unexpected places. A moisture meter can be a worthwhile investment, letting you scan along the wall for “hot spots” of hidden dampness.
If you spot visible mold, extensive wall damage, or can’t access the valve area, don’t hesitate to call a licensed plumber. DIY is best for minor investigations—major leaks or mold mean it’s time for an expert.
Try this step today: Carefully remove the shower handle cover plate and shine a flashlight inside. Look for signs of moisture, corrosion, or an active drip. Even a small bead of water deserves attention.
0–24–48 Hour Action Timeline for Suspected Leaks
Timing is everything when it comes to moisture control in San Diego homes. The EPA recommends drying water-damaged areas and items within 24–48 hours to reduce mold risk. Here’s what to do if you’ve found signs of a shower valve leak behind the wall.
0–24 hours: Immediately stop using the shower. Use towels and fans to dry any visible water or dampness. Document everything—take photos of the damage, note the date and time, and jot down your observations. If you’re in a rental or condo, notify your landlord or HOA right away—documentation helps if there’s an insurance claim or shared wall responsibility.
If the wall is clearly wet, or if you see water pooling at the base, remove nearby baseboards or carefully cut a small inspection hole to improve airflow. In coastal neighborhoods, where June Gloom and marine layer humidity slow down evaporation, this step is especially important.
24–48 hours: Schedule a plumber to repair the leak and, if you suspect mold, arrange for a moisture or mold inspection. Set up a dehumidifier or run a bathroom exhaust fan (ideally for 20–30 minutes at a time) to keep humidity in the 30–50 percent range—never above 60 percent. Open windows if outdoor humidity is lower than indoors.
Keep documenting: take new photos, note any changes, and record your water meter readings if possible. This information is vital for insurance or landlord follow-up.
Safety tip: If you see visible mold, have extensive wall damage, or suspect contaminated water, limit your exposure and call a pro. Don’t attempt DIY mold cleanup on large or porous surfaces—improper handling can spread spores.
Moisture Control & Mold Prevention—Next Steps for San Diego Homes
Stopping a shower valve leak is step one. Preventing moisture problems and mold is ongoing. After repairs, monitor the area for at least a week using a hygrometer—a $20 investment that pays off in peace of mind. Place it near the repaired wall but away from direct shower spray, and check that relative humidity (RH) stays between 30–50 percent.
Test your bathroom exhaust fan: hold a tissue up to the grille. If it doesn’t stick, your fan may be underpowered or clogged (standard CFM for a small bath is at least 50). For homes near the coast, a humidity sensor or smart fan can help manage those foggy “June Gloom” mornings when marine layer moisture spikes.
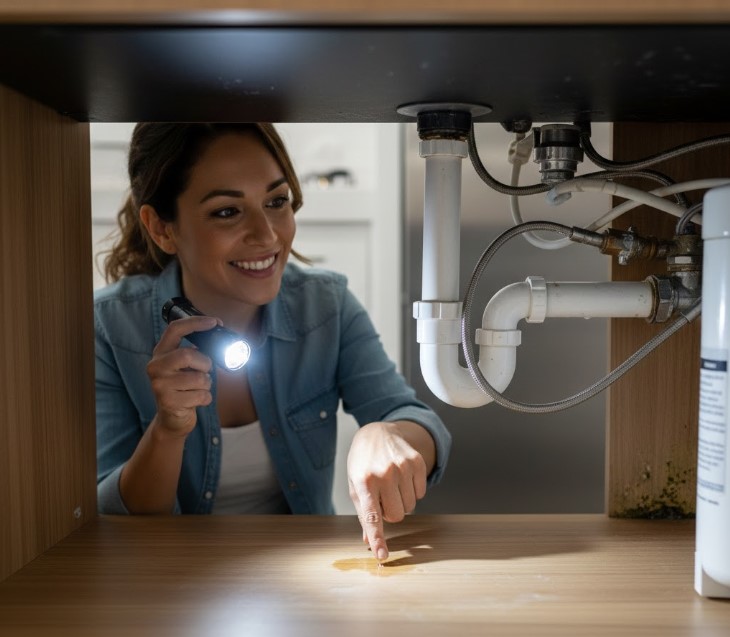
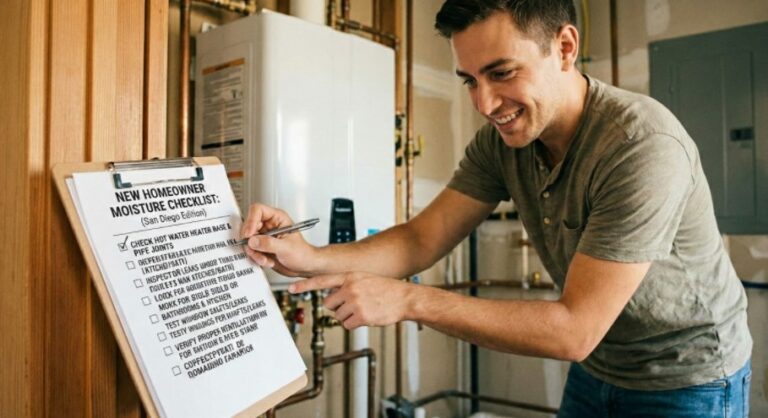
Inspect under sinks, around toilets, and near any plumbing fixtures monthly. Look for condensation on pipes—especially cold water lines. Reseal grout and caulk yearly to keep water where it belongs. If you’re in a rental or condo, check your HOA or lease for who handles moisture issues—quick reporting protects your interests and your neighbors’.
Do this now: Test your bathroom fan with the tissue trick, and set a calendar reminder to check behind bathroom fixtures once a month. If you’ve had water damage, keep a simple humidity log for the next 7 days to track conditions.
FAQ
What are the early signs of a shower valve leak behind the wall?
Look for musty odors after showers, bubbling paint, soft or damp drywall, and unexplained mold spots. Higher water bills can also be a subtle clue.
How can I confirm a hidden bathroom leak without opening the wall?
Remove the shower handle cover plate and check the valve area for moisture. Use a flashlight and mirror, or a moisture meter to scan the wall surface.
Are shower valve leaks common in San Diego homes?
Yes, especially in older homes and condos with tiled showers or shared plumbing walls. Coastal fog and marine layer humidity can make leaks harder to spot.
What should I do in the first 24–48 hours after finding a leak?
Stop using the shower, dry the area, document everything (photos, notes), and notify your landlord or HOA if applicable. Schedule repairs and check for mold within 48 hours.
Can I fix a shower valve leak myself, or should I call a plumber?
DIY inspection is fine, but leak repairs—especially behind walls—are best left to licensed plumbers. Mold or extensive damage always requires a professional.
How do I prevent mold after a bathroom leak?
Keep indoor humidity below 60 percent (ideally 30–50 percent), dry all water-damaged materials within 24–48 hours, and monitor for recurring moisture.
Is it safe to use my shower if I suspect a leak?
No. Continued water use can worsen damage and increase mold risk. Stop using the shower until repairs are made.
What tools help find hidden moisture behind walls?
A moisture meter, hygrometer, flashlight, inspection mirror, and sometimes a small inspection camera are useful for leak detection.
Next Steps:
Do the “10-minute bathroom leak inspection” today. Track your bathroom’s humidity with a hygrometer for the next 7 days. If you find signs of a leak or water damage, document everything and schedule a professional inspection—acting fast now can save you major headaches down the road. For more on moisture control and leak detection, check out our Complete Guide to Moisture Control in San Diego Homes.