San Diego homeowners face a unique set of moisture challenges, from the ever-present marine layer and “June Gloom” to surprise inland heat waves. When a leak or water event happens, it’s tempting to think we’re in the clear as soon as the visible water is gone. Unfortunately, what looks dry on the surface can be far from truly dry underneath. Whether we’re in a coastal condo, a Craftsman bungalow, or a rental unit, understanding how hidden moisture lingers—and how to verify materials are actually dry—is essential for preventing mold and long-term damage.
Why “Looks Dry” Isn’t Enough: Moisture Hides in Plain Sight
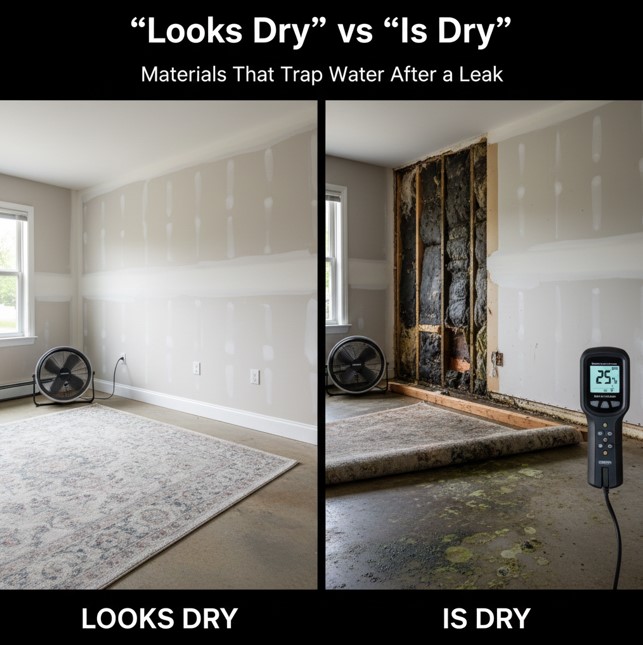
It’s easy to trust our eyes when it comes to water damage. If a bathroom floor, wall, or ceiling feels dry 12 hours after a leak, who wouldn’t assume the danger has passed? Here’s the catch: many common building materials are like sponges, absorbing water into their cores while drying quickly on the surface.
Drywall, for instance, can look fine after a mop-up but still hold enough moisture inside to support hidden mold growth. Wood framing and baseboards, cellulose insulation, and carpet pads are notorious for this. The distinction is simple: “looks dry” means surface water is gone, but “is dry” means the entire material has returned to a safe moisture level.
San Diego’s climate complicates things further. Coastal fog and marine layer moisture slow evaporation, especially in tight, energy-efficient homes where air doesn’t circulate freely. Inland, quick heat spikes may dry surfaces fast, but drive water deeper into porous materials. Consider a flooded bathroom: even after towels and fans, water can seep beneath vinyl flooring or behind baseboards, where it lingers out of sight.
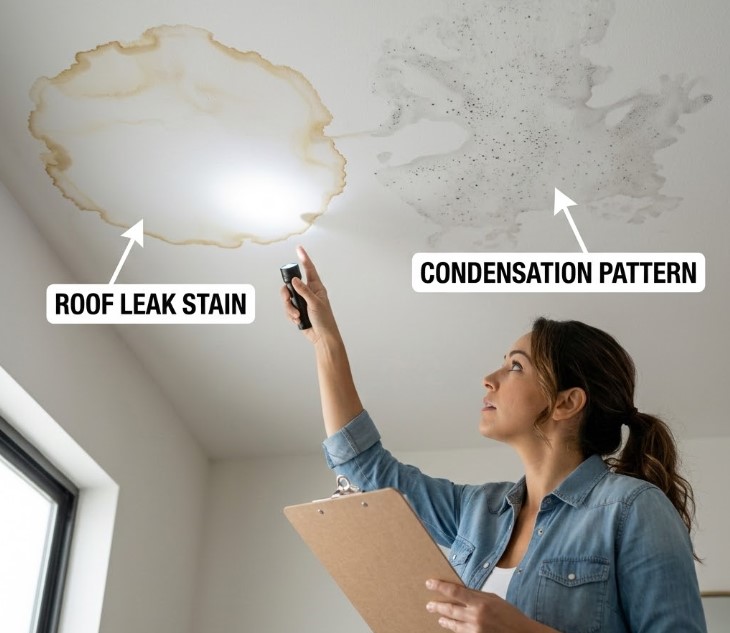
We can’t rely on looks alone. Within 24–48 hours of any leak, we need to check for subtle signs like musty odors, discoloration, or soft spots. If we ignore these, we risk trading a quick cleanup for a much bigger (and costlier) mold problem down the road.
Do this now: After any leak, do a hands-on inspection within 24–48 hours—even if everything looks fine. Check for musty smells, soft spots, or discoloration on walls and floors.
Materials That Trap Water—And Where to Find Them in Your Home
Some materials are far better at hiding water than others, and knowing where to look is half the battle. In our experience, these high-risk areas crop up again and again in San Diego homes, condos, and rentals.
Drywall and insulation (especially fiberglass and cellulose) can trap moisture for days or weeks. Engineered wood—think laminate flooring or MDF cabinetry—swells quickly and holds onto water. Carpeting and pads, as well as subfloors, become hidden reservoirs after even minor leaks. We often see baseboards and cabinetry in kitchens and bathrooms act as silent sponges.
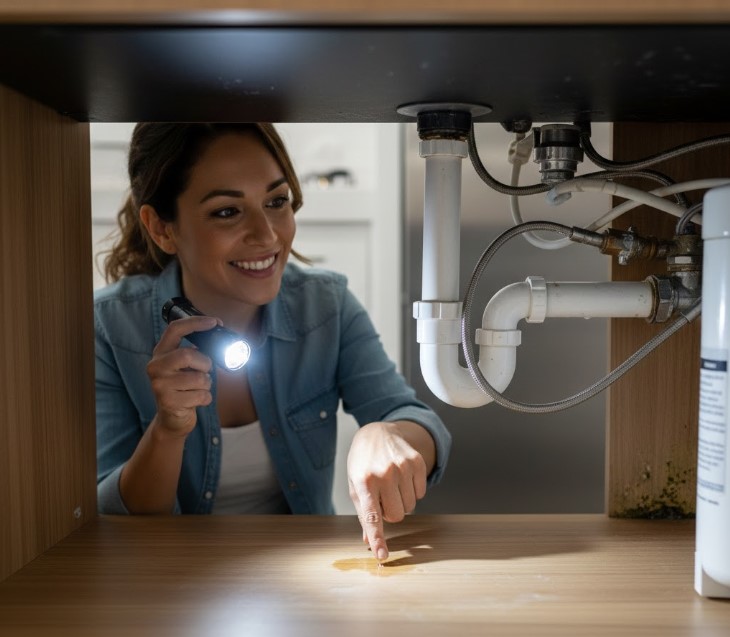
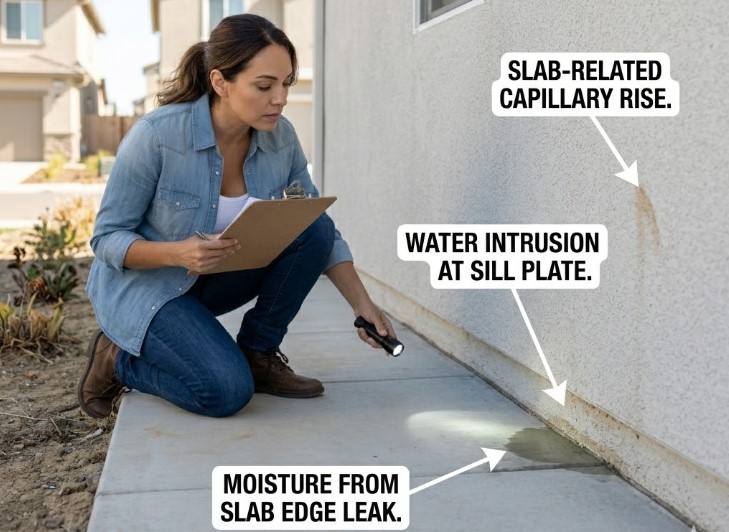
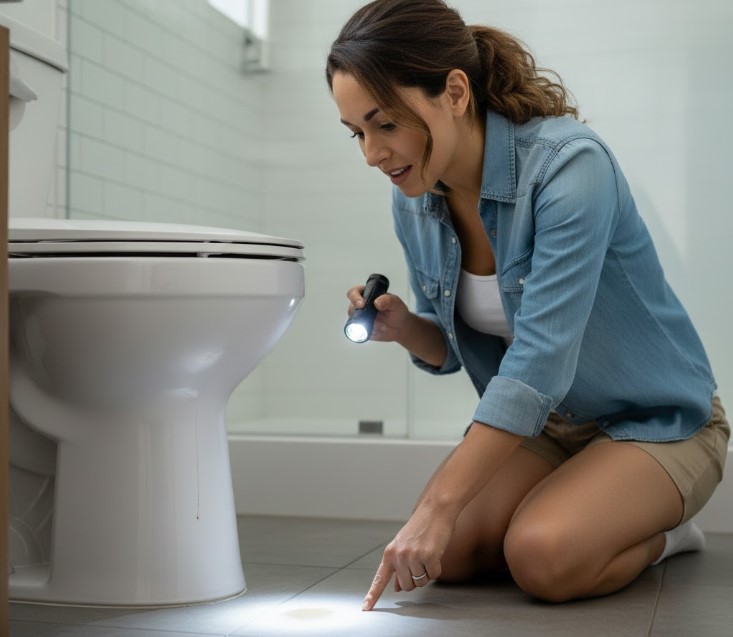
Where are these materials most problematic? Bathrooms (under sinks, behind toilets, around shower valves), kitchens (dishwasher, refrigerator lines), attics (condensation from marine layer humidity), and crawl spaces are repeat offenders. Shared walls in condos and apartments deserve special scrutiny—water can travel between units, causing disputes over responsibility if not documented properly.
Newer homes with tight building envelopes are actually more prone to hidden moisture, especially along the coast. Less airflow means water has fewer ways out, so a morning of June Gloom can leave condensation on windows and inside walls that never fully dries.
Five red flags that a material is still wet:
– Persistent musty smell (especially after drying efforts)
– Peeling paint or bubbling wallpaper
– Warped, swollen, or buckling wood or laminate
– Visible staining or “ghosting” (dark outlines on drywall or ceiling)
– Cold or damp spots to the touch, even when the rest of the room feels dry
Do this now: Buy or borrow a moisture meter—pin or pinless types are available—and test drywall and baseboards near a recent leak. Record your readings; even a $30 device can catch trouble early.
0–24–48 Hour Timeline: What to Do After a Leak or Water Event
When water strikes, time is our most critical resource. The EPA and every mold expert we know agree: drying within 24–48 hours is the single best way to prevent mold and structural damage.
0–24 hours:
First, stop the source—shut off valves, patch roof leaks, or clear clogged HVAC condensate lines. Remove standing water using towels, mops, or a wet vac. Open windows where possible (unless outdoor humidity is extreme), and turn on fans to boost circulation. Take photos and document all visible damage for your records, insurance, or to notify your landlord or HOA.
24–48 hours:
Bring in dehumidifiers (set to keep indoor RH below 60%, ideally 30–50%). Pull up rugs, move furniture, and check under sinks and appliances. Use your moisture meter and flashlight to check behind baseboards, inside cabinets, and under flooring. If you spot visible mold, suspect contaminated water (sewage, gray water), or the leak affects a shared wall or floor in a multi-unit building, call a professional immediately.
Renters should notify landlords promptly, in writing, and document all findings—this protects your security deposit and ensures repairs aren’t delayed. Condo owners should review HOA rules regarding water damage reporting and remediation.
Do this now: Download or print our 0–24–48 Hour Leak Response Chart and keep it with your emergency kit.
How to Confirm “Is Dry”—DIY and Pro Tools for Verification
It’s not enough to trust a dry touch or a lack of visible water. We need to measure moisture before closing up walls or reinstalling flooring. Moisture meters are our best line of defense—pin-type meters penetrate drywall or wood to check internal moisture, while pinless types scan surfaces for hotspots.
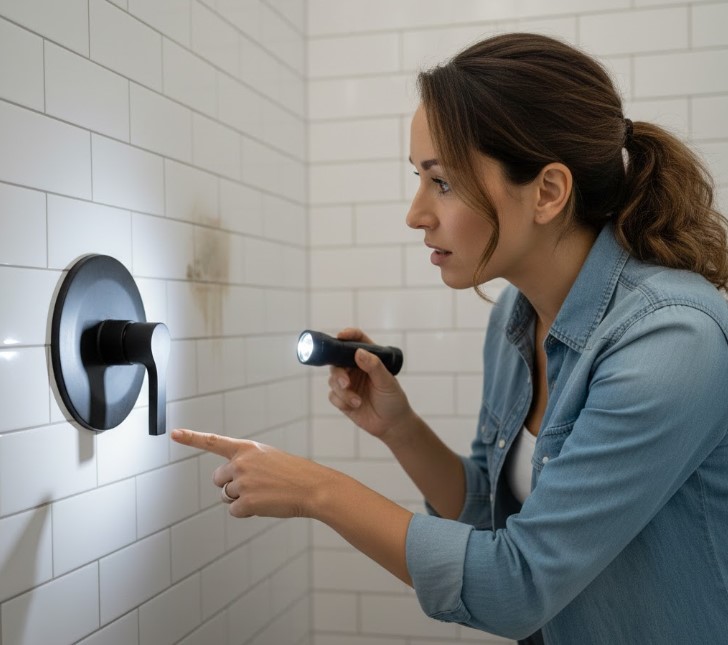
After a leak, check multiple spots: behind baseboards, inside cabinets (especially under sinks), under carpet edges, and—if accessible—inside wall cavities. For example, after repairing a shower valve leak behind a bathroom wall, use a moisture meter along the affected area. Record readings; most drywall should be below 16% moisture content before we consider it dry.
Relative humidity (RH) is just as important. Place a hygrometer in the affected room, away from drafts or direct sunlight. Our goal: keep indoor RH between 30–50% (never above 60%). This is especially important during San Diego’s marine layer mornings or after a summer HVAC run—both can spike condensation and mask lingering moisture.
DIY inspections are usually enough for minor leaks, but if you see high readings, find hidden stains, or suspect water traveled into inaccessible spaces (like crawl spaces or shared condo walls), it’s time to call a professional with infrared cameras or deep-probe meters. Keep photos and readings for post-remediation verification or insurance documentation.
Do this now: Rent or borrow a moisture meter from your local hardware store—test and record readings in at least three different spots after any significant leak.
Preventing Future Problems: Ventilation, Condensation, and Long-Term Moisture Control
Even after we dry out a water event, preventing a repeat is just as important. Mold is just a symptom—the underlying cause is always excess moisture. That’s why controlling humidity and improving ventilation is our first line of defense in San Diego homes.
Bathrooms need exhaust fans sized to the room (look for the correct CFM rating) and vented outside—not into the attic. Kitchens need range hoods, and laundry rooms should have properly vented dryer ducts. Attics and crawlspaces require adequate airflow; otherwise, coastal fog or inland heat will create perfect conditions for sweating AC ducts, condensation on windows, and attic or crawl space moisture.
For condos and rentals, some upgrades may be off-limits—so focus on what you can control: regular inspections, reporting leaks promptly, and tracking indoor RH with a hygrometer. Smart sensors can alert us to sudden spikes in humidity, which often signal a hidden leak or condensate line clog.
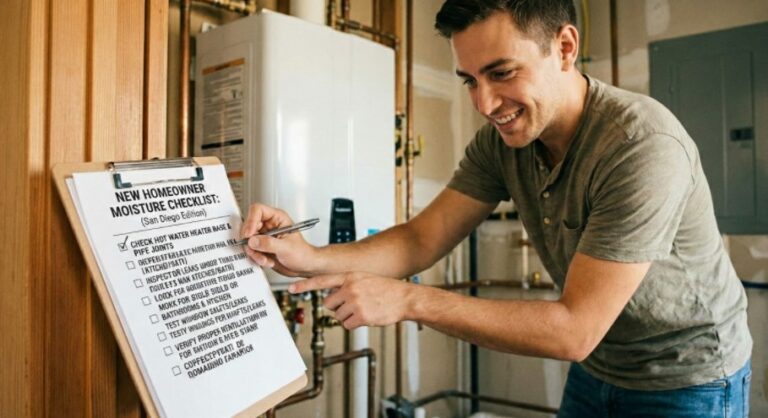
Annual Home Moisture Inspection Checklist:
– Inspect under sinks, behind toilets, and around showers for signs of leaks
– Check for condensation on windows and walls during marine layer or “June Gloom”
– Confirm bathroom and kitchen fans are working (perform the tissue test: hold a tissue up and see if it’s drawn in)
– Review attic/crawl space for signs of moisture, staining, or musty odor
– Test RH in multiple rooms; keep records for your own peace of mind
Do this now: Set a calendar reminder to check RH and inspect under sinks after the next major rain, especially if you live in an older San Diego home.
FAQs
How can I tell if my drywall is still wet after a leak?
Use a moisture meter—surface dryness isn’t enough. Look for musty smells, stains, or soft spots. If in doubt, call a pro for deeper testing.
What materials in my home trap water the longest?
Porous materials like drywall, insulation, carpet pads, and engineered wood are the worst offenders.
How long does it take for mold to start growing after a leak?
Mold can start within 24–48 hours if materials stay wet, especially in warm or humid conditions.
When should I call a professional after a water leak?
If water has soaked into walls or floors, there’s visible mold, or you’re in a multi-unit building, get a pro—especially for post-remediation verification and insurance documentation.
Can moisture meters be used by homeowners?
Absolutely. Many models are affordable and easy to use—just follow the instructions and compare readings to known dry areas.
What’s the best way to dry out hidden moisture in walls?
Increase ventilation, use dehumidifiers, and, if necessary, remove baseboards or drill small inspection holes. For major leaks, professional drying may be required.
How do I prevent leaks and moisture problems in a rental or condo?
Do routine inspections, report leaks immediately, document with photos, and follow your rental moisture checklist.
Is it safe to clean up after a water leak myself?
For clean water leaks and small areas, yes—use gloves and detergent/water for hard surfaces. For sewage, mold, or large events, call a pro.
Next Steps:
– Do the 10-minute post-leak inspection checklist.
– Track your home’s humidity for 7 days with a hygrometer.
– Document and photograph any suspected water damage for your records or insurance.
– Schedule a professional moisture inspection if you spot red flags or have recurring leaks.
For more on San Diego moisture control, check our in-depth guides on DIY Leak Detection, Best Ventilation Practices, and What to Do in the First 24 Hours After a Leak. Stay vigilant—hidden moisture after a leak is a problem we can’t afford to ignore.