A mold inspection typically involves a thorough visual assessment, moisture detection, targeted questions about your home’s history, and, if needed, sample collection to identify the type and source of mold growth.
For San Diego homeowners—whether you’re living by the coast with its regular marine layer and June Gloom, or inland where heat can amplify unnoticed leaks—understanding what happens during a mold inspection is crucial. Here, mold isn’t just an unsightly problem; it’s often the symptom of underlying moisture issues that, if left unchecked, can compromise both your home’s structure and your family’s health.
- Inspectors look for visible signs of mold and moisture damage.
- They use moisture meters and thermal cameras to detect hidden dampness.
- Questions are asked about water leaks, condensation, and ventilation.
- Air or surface samples may be collected if needed.
- The final report identifies mold sources and recommends moisture control actions.
What Triggers a Mold Inspection?
You’ll want to schedule a mold inspection when you notice musty odors, see suspicious spots on walls or ceilings, spot recent leaks, or experience unexplained health symptoms that may be linked to your indoor environment—especially in a place like San Diego, where coastal fog and seasonal rains can sneak moisture into the tightest spaces. After a heavy rain, a burst pipe, or even a stretch of humid, foggy weather, your risk of hidden moisture goes up. The pattern I keep seeing is that older condos with less effective ventilation, or homes closer to the ocean, can develop these issues seemingly overnight.
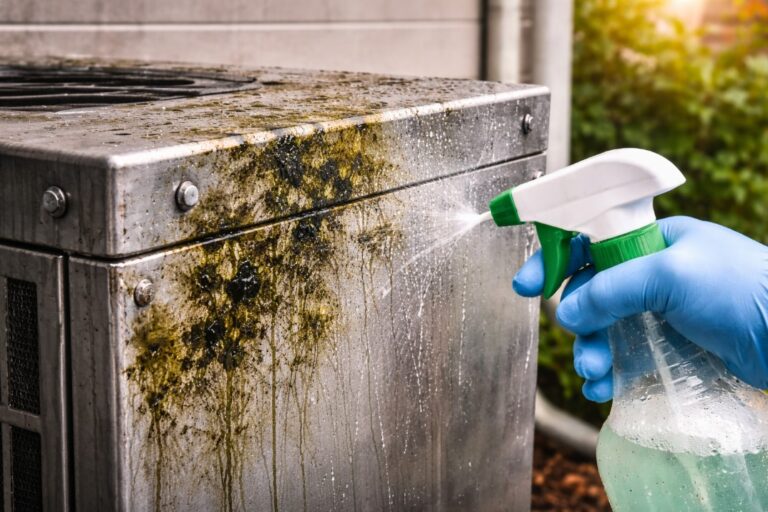
Here’s what you need to remember: mold is almost always a sign of an underlying moisture problem. If you don’t fix the source—maybe a slow plumbing leak behind drywall, or recurring condensation from the marine layer—it’s only a matter of time before mold returns, no matter how thoroughly you clean.
If you notice new stains, odors, or humidity after weather events, schedule a mold inspection within 24–48 hours. That quick turnaround matters because mold can begin to grow within 24–48 hours of a moisture event, especially in warm, humid San Diego conditions.
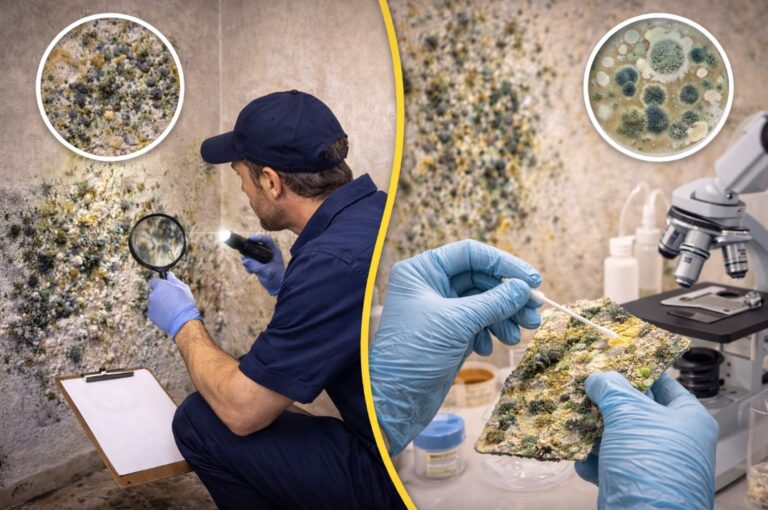
Step 1: Visual Assessment—Beyond Just Mold Spots
The first thing your inspector will do is a visual sweep of your home, going well beyond just looking for obvious mold. You can expect a careful examination of walls, ceilings, floors, around windows, inside bathrooms, under sinks, and even your HVAC system. They aren’t just looking for green or black spots, but also for water stains, peeling paint, warped wood, and subtle signs of condensation.
San Diego’s unique climate makes this step more challenging than you might think. That persistent marine layer—especially during June Gloom—can hide moisture damage under what looks like simple dirt, or cause stains to appear only after the fog lifts and things start to dry out. And this is where it gets interesting: inspectors are trained to spot the less-obvious clues, like warped baseboards in an inland home after a heatwave or faint water rings on a ceiling in a coastal condo.
Ultimately, the real target is moisture. Mold is just one piece of the puzzle, and a good inspector will be chasing down the source of that water, not just the mold itself.
Clear access to areas with past leaks or musty smells before the inspector arrives. This ensures nothing gets missed during the visual check.
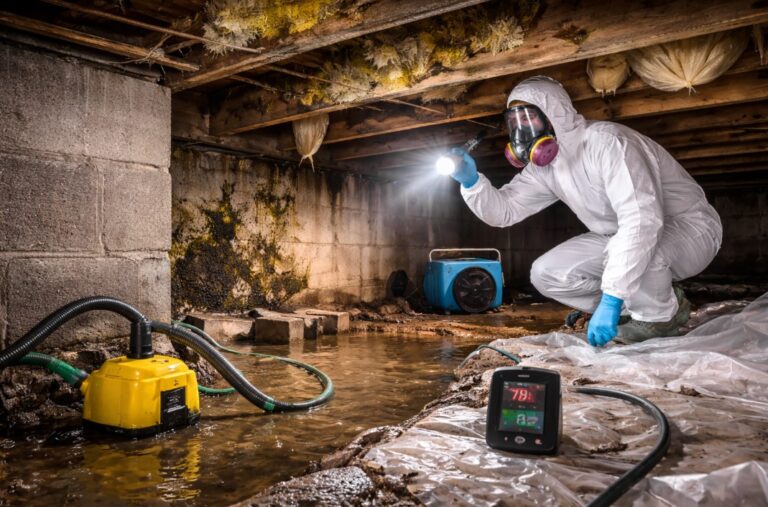
Step 2: Moisture Detection—Tools and Techniques
After the visual scan, inspectors dig deeper using moisture meters and thermal imaging cameras to find hidden dampness you can’t see or feel. These tools are essential for identifying moisture trapped inside walls, under floors, or above ceilings—places where even a small leak can lead to escalating damage, especially after a stretch of hot inland weather or a surprise storm.
Moisture meters measure the actual water content in materials like drywall or wood. Thermal cameras, on the other hand, pick up temperature differences that reveal damp spots behind surfaces. What surprised me most was how even a tiny drip behind a wall—ignored after a hot San Diego summer—can set up the perfect conditions for mold.
Persistent dampness isn’t just a nuisance; it’s what keeps mold coming back. That’s why pro inspectors focus so much on finding every last hidden patch of moisture.
One important safety note: don’t try to open up walls or poke around electrical outlets yourself. Wet wiring and hidden leaks can be hazardous, so leave invasive checks to the pros.
Document any past water events and share with your inspector to guide moisture checks. The more details you provide, the better your inspector can target their search.
Step 3: Asking the Right Questions—Home History Matters
A thorough mold inspection isn’t just about what the inspector sees; it’s also about what you know. Expect a lot of questions about your home’s history—recent plumbing leaks, roofing repairs, floods, and how you handle ventilation. If you live in a condo or rental, be ready to discuss shared walls, common plumbing, and any history of water problems in neighboring units.
Lifestyle matters, too. Do you use exhaust fans when showering? Do you regularly open your windows during the marine layer, or keep everything sealed tight during heatwaves? These habits can make a difference in how much moisture lingers in your home.
Mold is really just a symptom, and your answers help the inspector zero in on recurring sources of unwanted moisture. If you’ve had a leaky dishwasher or a roof repair last winter, mentioning it now could be the key to pinpointing where mold is hiding.
Prepare a log of past leaks, repairs, and any persistent musty odors before inspection day. This simple step can save time and help your inspector connect the dots.
Step 4: Sampling and Reporting—When Is It Needed?
Sampling for mold—whether it’s air tests or surface swabs—isn’t always necessary. A professional inspector will only suggest sampling if the source of the issue isn’t obvious, or when there’s a need to document the problem for health or legal reasons. In San Diego, foggy coastal homes sometimes require sampling because visual clues can be subtle or hidden by regular humidity.
When samples are taken, expect the inspector to explain what they’re testing for and why. But it’s the final report that matters most. A good report doesn’t just list mold types; it should clearly identify the moisture sources behind the growth. It should also offer practical recommendations—fixing leaks, improving ventilation, and keeping indoor humidity below 60% (ideally, between 30% and 50%).
Request a written report summarizing both mold findings and moisture recommendations. Having this in writing helps you prioritize repairs and, if you’re a renter or condo owner, share the findings with your landlord or HOA.
Sampling and interpreting results are best left to certified pros. DIY test kits are rarely reliable for making real decisions about repairs or remediation.
Official Guidance
- EPA: Identify and fix the moisture problem before cleaning up mold.
- CDC: Mold sampling is rarely needed if visible growth is present.
- California Department of Public Health: Remove visible mold and repair water damage promptly.
- EPA: Use professionals for large or hidden mold issues, especially after flooding.
- CDC: Increase ventilation and dehumidify damp spaces to prevent recurrence.
Sources Note
- EPA (Environmental Protection Agency)
- CDC (Centers for Disease Control and Prevention)
- California Department of Public Health
This information is for general guidance only. For confirmed or extensive mold problems, consult a certified mold inspection specialist.
FAQ
What should I expect during a mold inspection?
You can expect a thorough visual check, moisture testing using specialized equipment, questions about your home’s history, and possibly sampling if hidden mold is suspected. A final report should explain findings and recommend moisture control steps.
How do inspectors detect hidden mold or moisture?
Inspectors use moisture meters and thermal imaging cameras to find dampness inside walls, floors, and ceilings—places where mold can grow unseen.
Is mold sampling always necessary in San Diego homes?
No, sampling is only done if the source isn’t clear or for health documentation. In many cases, visible mold and moisture clues are enough for a proper assessment.
How long does a typical mold inspection take?
Most inspections take 1–2 hours, depending on your home’s size and complexity. Larger homes or those with multiple problem areas may require more time.
Should I do anything to prepare for a mold inspection?
Yes—clear access to areas with past leaks, prepare a log of water issues, and notify your landlord or HOA if you’re in a rental or condo.
What happens if the inspector finds moisture but no visible mold?
They’ll recommend fixing the moisture source and monitoring the area, since mold can develop within 24–48 hours if dampness isn’t resolved.
Can I handle a mold inspection myself, or do I need a pro?
You can look for obvious signs, but only a professional has the tools and expertise to detect hidden moisture and provide reliable recommendations—especially for condos, rentals, or larger homes.
Are there health risks if I delay mold inspection after a leak?
Delaying inspection gives mold a chance to grow, which may be linked to respiratory symptoms and building damage. Quick action reduces both health and repair risks.
What to Do Next
- Schedule a professional mold inspection if you’ve recently had a leak or noticed musty odors.
- Review your ventilation practices and fix plumbing issues to prevent future moisture problems.
- Share your inspection report with building management if you live in a condo or rental.